Outlook issues in the June 2017 security updates

The problems stems from June 2017 security updates. Microsoft is investigating the issues and will update this page when a fix is available. In the meantime, please use the workarounds suggested for each issue. They have categorized it in seven scenarios.

Issue#1: Error when opening an attachment is an email, contact, or task formatted as Rich Text.

This issue affects Outlook 2007 and Outlook 2010.

When you open an attachment in an email, contact, or task formatted as Rich Text you get the following error:
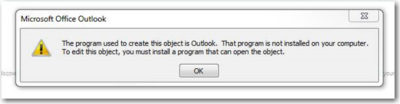
outlook-2010-2007-this-program-used-to-create-is-outlook-not-installed

You may also see:

STATUS: WORKAROUND

  • Forward the email to yourself and then open the attachments from the forwarded email.
  • Change the email format to HTML, or Text format.
  • Save the attachments to your computer, using one of the following methods, then open them from the saved location: Drag and drop the attachments to your desktop.
    Go to File > Save Attachments.
    Copy and paste the attachment to your computer.

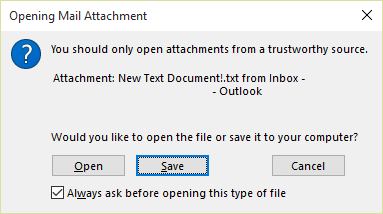
Issue#2: Opening Mail Attachment warning when opening an attachment that includes consecutive periods

This issue affects Outlook 2007, Outlook 2010, Outlook 2013, and Outlook 2016.

When opening an attachment that includes consecutive periods (…), or an exclamation point (!), the files are blocked and you receive an Opening Mail Attachment warning.

Or if an email message includes an attached email message, and the attached email message’s subject line ends with an unsafe file name extension as listed in the Blocked attachments in Outlook, the email attachment will be blocked for recipients.

STATUS: WORKAROUND

If you get the Opening Mail Attachment warning, and you’re sure the attachment was sent from a trusted source, proceed to Open or Save the attachment.

If the file is blocked because of a potentially unsafe file extension, ask the sender to save the email message to their computer and rename its subject line so that it does not end with an unsafe file name extension. Then, attach it to the email message and resend.

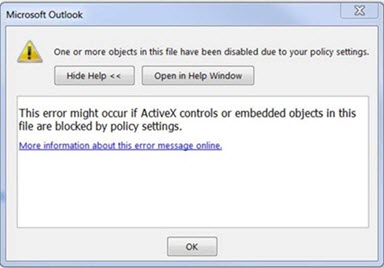
Issue#3: Error when setting ShowLevel1Attach to allow Outlook to display Level 1 attachments

This issue affects Outlook 2013 and Outlook 2016.

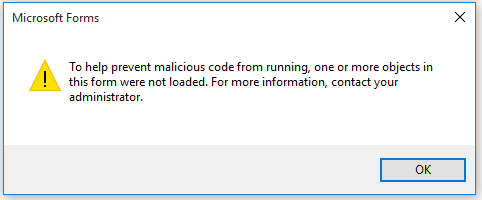
If you set ShowLevel1Attach to allow Outlook to display Level 1 attachments, you may see the error: “One or more objects in this file have been disabled due to your policy settings”.

WARNING: Typically, Level 1 attachments are blocked. If you have enabled this policy, users can see Level 1 attachments in Outlook. If you use any of the workarounds to open the files, please make sure they are safe to open. See: Information for administrators about e-mail security settings in Outlook 2007.

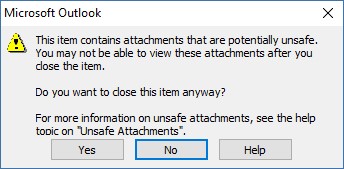
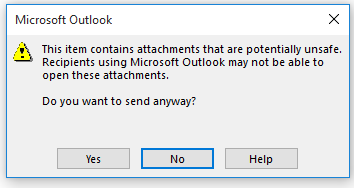
If you set ShowLevel1Attach to allow Outlook to display Level 1 attachments, and you send an email with an attachment you may see this message: “This item contains attachments that are potentially unsafe.  Recipients using Microsoft Outlook may not be able to open these attachments.”

STATUS: WORKAROUND

  • Change the email format to HTML, or Text format.
  • Save the attachments to your computer, using one of the following methods, then open them from the saved location:
    • Drag and drop the attachments to your desktop.
    • Go to File > Save Attachments.
    • Copy and paste the attachment to your computer.

Issue#4: VBScript does not run or you receive malicious code warning when using a custom form for Outlook

This issue affects Outlook 2007, Outlook 2010, Outlook 2013, and Outlook 2016.

When you use a custom form that you have created for Outlook, you see the following two symptoms:

  • VBScript does not run.
  • You get a malicious code warning: 

STATUS: INVESTIGATING

We’re investigating this issue and will update this page when a fix is available.

Issue#5: “Something went wrong….” or “Search results may be incomplete” error when searching in Outlook

This issue affects all Outlook versions on Windows 7, Windows 8, Windows 10.

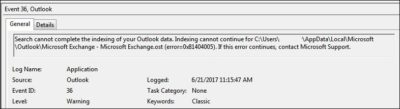
When searching in Outlook, you get this error: “Something went wrong and your search couldn’t be completed.”, or “Search results may be incomplete because items are still being indexed“.

And you’ll see this Event Log warning:

STATUS: WORKAROUND

Until the Windows Update fix release on 6/27, you can set a registry key that will cause Outlook to stop using the local Windows Search service. When this registry key is set, Outlook will use its own built-in search engine. The built-in search will display the message below to indicate it is not using the Windows Search service.

Disable Windows Desktop Search Service for Outlook:

NOTE: The following steps show you how to modify the registry. However, serious problems might occur if you modify the registry incorrectly. Please make sure that you follow these steps carefully. For added protection, back up the registry before you modify it. Then, you can restore the registry if a problem occurs. For more information about how to back up and restore the registry, see this article.

  • Open Registry Editor.
  • Go to: Computer\HKEY_LOCAL_MACHINE\SOFTWARE\Policies\Microsoft\Windows\Windows Search
  • PreventIndexingOutlook
  • Set DWORD: 1

Detailed Instructions:

  1. Click Start, click Run, type regedit in the Open box, and then click OK.
  2. Locate and then click the following subkey in the registry:
    HKEY_LOCAL_MACHINE\SOFTWARE\Policies\Microsoft\Windows
  3. On the Edit menu, point to New, and then click New Key and name the key Windows Search.
  4. Click on the new key Windows Search.
  5. On the Edit menu, point to New, and then click DWORD Value.
  6. Type PreventIndexingOutlook for the name of the DWORD, and then press Enter.
  7. Right-click PreventIndexingOutlook, and then click Modify.
  8. In the Value data box, type 1 to enable the registry entry, and then click OK.
  9. Note to disable the PreventIndexingOutlook setting, type 0 (zero), and then click OK.
  10. Exit Registry Editor, and then restart Outlook.

Issue#6: iCloud fails to load properly in Outlook 2007

iCloud fails to load properly in Outlook 2007.

When accessing Calendar, Contacts, or Tasks in Outlook 2007, you get the following error:

The set of folders cannot be opened. MAPI was unable to load the information service C:\PROGRA~2\COMMON~1\Apple\Internet Services\APLZOD.dll. Be sure the service is correctly installed and configured.”

STATUS: WORKAROUND

The loading of unregistered MAPI services has been disabled by default to make Outlook more secure.

WARNING: This workaround may make your computer or your network more vulnerable to attack by malicious users or by malicious software such as viruses. Microsoft does not recommend this workaround but is providing this information so that you can choose to implement this workaround at your own discretion. Use this workaround at your own risk.

If you have trusted applications that depend on being loaded in this manner, you can re-enable those applications by setting the following registry key:

REG_DWORD HKEY_CURRENT_USER\Software\Microsoft\Office\12.0\Outlook\Security\AllowUnregisteredMapiServices

You can use the following registry subkey to apply the registry setting as a domain policy:

HKCU\Software\Policies\Microsoft\Office\12.0\Outlook\Security\AllowUnregisteredMapiServices

Value 0 (default): Block loading of unregistered MAPI services. This is the recommended setting to avoid unexpected execution of unknown code.

Value 1: Enable loading of unregistered MAPI services.

IMPORTANT: The following steps show you how to modify the registry. However, serious problems might occur if you modify the registry incorrectly. Please make sure that you follow these steps carefully. For added protection, back up the registry before you modify it. Then, you can restore the registry if a problem occurs. For more information about how to back up and restore the registry, see this article.

To make these registry changes, follow these steps:

  1. Click Start, click Run, type regedit in the Open box, and then click OK.
  2. Locate and then click the following subkey in the registry:HKCU\Software\Microsoft\Office\12.0\Outlook\Security\
  3. On the Edit menu, point to New, and then click DWORD Value.
  4. Type AllowUnregisteredMapiServices for the name of the DWORD, and then press Enter.
  5. Right-click AllowUnregisteredMapiServices, and then click Modify.
  6. In the Value data box, type 1 to enable the registry entry, and then click OK.

    NOTE: To disable the AllowUnregisteredMapiServices setting, type 0 (zero), and then click OK.

  7. Exit Registry Editor, and then restart the computer.

Vulnerability information (applies to all versions)

MAPI does not validate that a provider’s DLL that it is requested to load is registered correctly in MapiSVC.inf or even that it comes from the local machine. This can be exploited by creating a file together with an OLE object in such a way to cause MAPI to load a DLL from a network share when the OLE object is activated. This can allow arbitrary code execution to occur.

Issue#7: When printing a specific iframe or frame in a web page, the print output may be blank, or text is printed with a 404

This issue affects all Outlook versions on Windows 7, Windows 8, Windows 10.

When you print a specific iframe or frame in a web page, the print output may be blank, or text is printed that resembles the following:

NOTE: A frame is a part of a web page or browser window that displays content independent of its container. A frame can load content independently.

This problem has also been observed in both Internet Explorer 11, and in applications that host the IE Web Browser Control.

STATUS: INVESTIGATING

There is currently no workaround for this issue. However, if you print the entire web page, it will print correctly. We’re investigating this issue and will update this page when a fix is available.

Option: Uninstall Recent Microsoft Update

It is not recommended to uninstall the update as it applies to some other issues but if none of the workarounds help then you have this option until a new fix is releases.

For Outlook 2010:

  1. Go to the Control Panel – Programs and features and select view installed updates on the left.
  2. Search or look for KB3203467 and highlight it and uninstall it.

For Outlook 2007:

  1. Go to the Control Panel – Programs and features and select view installed updates on the left.
  2. Search or look for KB3191898 and highlight it and uninstall it.

Have any questions?

Call us at: 856-745-9990 or visit: https://southjerseytechies.net/

South Jersey Techies, LLC is a full Managed Web and Technology Services Company providing IT Services, Website Design ServicesServer SupportNetwork ConsultingInternet PhonesCloud Solutions Provider and much more. Contact for More Information.

To read this article in its entirety click here.

Seven ways to sort and view Outlook email by accounts

Outlook


Most users manage more than one e-mail account. Outlook 2010 and 2013 automatically create individual folders for each account. If you’re still using Outlook 2007 or earlier, you can simulate this convenience, but you’ll have to set it up yourself. In this article, I’ll show you seven ways to sort or view email messages by their accounts. I’ll include instructions for 2010 and 2013; even if you need to sort by accounts, you might want to use these methods to sort by other criteria.

1. Create account-specific folders

You can simulate the account-specific Inbox configuration in Outlook 2010 and 2013 by creating new download folders for each account. Doing so is easy, and it’s probably the best way to manage multiple accounts in Outlook 2007 and earlier. You’ll create an account-specific folder as follows:

  1. Choose Account Settings from the Tools menu in Outlook 2007. (In Outlook 2010 and 2013, Account Settings are on the File tab.)
  2. Select the POP3 account you want to reconfigure.
  3. Click the Change Folder button. (This button isn’t available for IMAP accounts.)
  4. Use the resulting dialog to identify the folder you want to download your POP3 account mail to (Figure A) or create a new folder if it doesn’t already exist.
    Figure A

    Figure A
  5. Click OK and then Close.

After making this change, Outlook will download that account’s mail into the specified folder. You can create specific folders for every POP3 account you have.

Unlike the 2010/2013 configuration, all of your messages download into the same .pst file. In addition, Outlook will save copies of all sent messages in the default account, not in the account-specific folder.

2. Use a rule

Rules have been around for a long time. They’re commonly used to manipulate mail as it arrives. You can also use a rule to manipulate mail received from a specific account as follows:

  1. Select the Inbox.
  2. In Outlook 2003 and 2007, choose Rules and Alerts from the Tools menu. In Outlook 2010 and 2013, click the File tab and click Manage Rules & Alerts in the Account Information section. (Outlook 2010 and 2013 users won’t need this rule unless they choose to combine all accounts into the same Inbox. Although this is unlikely, I’m including the instructions to be as comprehensive as possible.)
  3. Click New Rule on the E-Mail Rules tab.
  4. In Outlook 2003 and 2007, use Check messages when they arrive. Outlook 2010 and 2013 users, select Apply rule on message I receive.
  5. Click Next.
  6. Check the through the specified account option.
  7. Click the specified link in the bottom pane (Figure B).
    Figure B

    Figure B
  8. Choose the account from the resulting drop-down, click OK, and then click Next.
  9. Check move it to the specified folder.
  10. Click the specified folder link in the bottom pane. Then, identify the folder to which you want to download mail from the specified account (Figure C), and click OK. You can create a folder at this point, if necessary.
    Figure C

    Figure C
  11. Click Next twice (you won’t want to include any exceptions to the rule most likely).
  12. Give the rule a name. I recommend a name that includes the account’s name, such as “Move message for account name.”
  13. Turn the message on if necessary.
  14. Select Run this rule now on messages already in “Inbox” (Figure D) if you want Outlook to move existing messages into the folder. Doing so can save a lot of time.
    Figure D

    Figure D
  15. Click Finish, and then click OK.

This rule works similarly to the account-specific folder tip in #1. If you’re not familiar with rules, take a minute to review the many conditions and actions; you can do a lot with rules.

3. Use the Account view option

You can use a view property to sort message by their accounts. In Outlook 2003 and 2007, choose Arrange By from the View menu and then select E-mail Account. The change is immediate, but its helpfulness in a busy Inbox is limited. You’ll probably find it more useful to combine this setting with other sorting methods, such as search folders and filters. After creating the main sort, apply this setting to further define the results by account. In addition, you can quickly apply this setting to all folders by modifying the default Messages view and then copying it. (For more complete instructions on applying this setting to all folders, read “Pro tip: Use standard and custom views to personalize an Outlook folder.”)

In Outlook 2010 and 2013, you can combine individual .pst files into one and download all mail into the same Inbox. You’ll find this setting in the Arrangement gallery on the View tab. (Click the More button to see all of the settings.)

4. Sort by the E-mail Account column

Similar to changing a view’s configuration, you can sort multi-account folders by accounts. You might find this alternative easier or preferable to creating or modifying a view. To add this column, do the following:

  1. Right-click the title bar (in the Mail window).
  2. Select Field Chooser from the resulting dialog.
  3. Choose All Mail Fields from the drop-down.
  4. Drag E-mail Account to the title bar (Figure E) and release it. If it’s not where you want it, drag it accordingly.
    Figure E

After adding the E-mail Account column, you can click it to sort all mail in the folder by their accounts.

5. Use a view

Both the Account view and adding the E-mail Account column will sort messages by accounts, but you’ll still see mail for all of your accounts. If you want to view mail from a single account, create a view. Then you can apply views to filter messages accordingly. To view messages from a single account using a filtered view, do the following:

  1. In Outlook 2003, choose Arrange By from the View menu. In Outlook 2007, choose Current View from the View menu. In Outlook 2010 and 2013, click the View tab and choose Manage Views from the Change View drop-down in the Current View group.
  2. Click New.
  3. Give the view a name. I recommend naming the view for the account.
  4. Select Table and All Mail and Post Folders (the default).
  5. Click OK.
  6. Click Filter.
  7. Click the Advanced tab in the resulting dialog.
  8. Choose All Mail fields from the Field drop-down, and then choose E-mail Account (Figure F).
    Figure F

  9. Choose is (exactly) from the Condition drop-down.
  10. Set the Value using the account’s name (Figure G).
    Figure G

  11. Click Add to List.
  12. Press OK twice.
  13. Click OK to close the Manage All Views dialog and return to the Mail window.

Repeat the above steps to create a custom view for each account. To view all the messages for only one account, choose the appropriate view from the Change View drop-down (in the Current View group).

6. Sort into search folders       billionphotos-1647683

Similar to filtering with a view, you can display account-specific mail in a search folder. The difference, of course, is the difference between a view and a folder. The view merely filters mail to determine what you see, but all of the messages are still there. A search folder contains links to only those messages that meet the folder’s search criteria. To create a search folder for this purpose, do the following:

  1. In Outlook 2003 and Outlook 2007, choose New from the File menu, and then select Search folder. In Outlook 2010 and 2013, click the Folder tab and then click New Search Folder in the New group.
  2. In the resulting dialog, choose Create a custom Search Folder (in the Custom section at the bottom of the list).
  3. Click Choose, and then name the new folder. I recommend that you name the folder for the account.
  4. Click Browse, exclude folders and subfolders you don’t want to search, and click OK. Doing so will speed up your search.
  5. Click Criteria, and then click the Advanced tab.
  6. Choose All Mail Fields from the Field drop-down and then choose E-mail Account.
  7. Choose is (exactly) from the Condition drop-down.
  8. Set the Value using the account’s name.
  9. Click Add to List.
  10. Click OK four times.

Create a folder for each of your accounts. To read the mail for an account, open that account’s search folder.

7. Format by account

Sometimes, a visual clue is all you need. When this is the case, apply a format to distinguish accounts as follows:

  1. In Outlook 2003 and 2007, choose Arrange By from the View menu. Choose Custom, and then select Automatic Formatting. In Outlook 2010 and Outlook 2013, click the View tab. Then, click View Settings in the Current View group. In the resulting dialog, click Conditional Formatting.
  2. Click Add and name the new View. I recommend that you name the view after the account.
  3. Click Condition.
  4. Click the Advanced tab.
  5. Choose All Mail Fields from the Field drop-down and then choose E-mail Account.
  6. Choose is (exactly) from the Condition drop-down.
  7. Set the Value using the account’s name.
  8. Click Add to List, and then click OK.
  9. In the Conditional Formatting dialog, click Font and change the formats accordingly. Changing the font’s color is a common choice.
  10. Click OK three times to return to the Mail window.

Outlook will update the folder immediately by applying the formats for the specified account.

About the .pst files

It might never matter to you, but should .pst management become an issue, keep the following in mind:

  • Outlook 2010 and 2013 download POP3 mail into separate (dedicated) .pst files. For each account, you’ll have a dedicated Inbox.
  • Outlook 2007 and earlier download all mail into the same .pst file, regardless of the changes you make for viewing the mail via the interface.

sjt


Have questions?

Our small business team is here to help.
Call us at: 856-745-9990

South Jersey Techies, LL C is a full Managed Web and Technology Services Company providing IT Services, Website Design ServicesServer SupportNetwork ConsultingInternet PhonesCloud Solutions Provider and much more. Contact for More Information.

 To read this article in its entirety click here.

Save Face at Work with Outlook


1. Save face with MailtipsHave you ever hit “Reply All” to an email when you didn’t mean to? Or sent important information to someone and never gotten a response, only to learn later their email address was invalid? Microsoft Exchange 2010 and MailTips, a new Microsoft Outlook 2010 feature, can help prevent embarrassing mistakes, save you time, and alleviate frustration.Learn more: Turn on or off MailTips
2. Share your scheduleYou can share your calendar with others on a Microsoft Exchange Server—with permission, of course. Or you can publish your default Outlook 2010 to the web, which can allow more people to view it. If you publish your calendar to the web, you don’t have to have an Exchange account, and anyone can see it, even if they don’t have an Exchange account, either.Learn more: Introduction to calendar sharing
3. Stop repeating yourselfDo you do a lot of the same things over and over with emails? Like frequently move messages to a specific folder that you’ve set up? Or often forward messages to your team? Quick Steps in Outlook 2010 can help by turning commands and procedures that you use most often into one click actions.Learn more: Automate common or repetitive tasks with Quick Steps
4. Get in on the conversation—and manage itAt work you may often have conversations over email, where several people are weighing in on important issues. Have you ever missed someone’s response in one of these email conversations? Now you can see your email within the context of the conversation, with Conversation View. See the overall conversation, including your responses, find the most recent response, and easily figure out the message that is most important to you.Learn more: View email messages by conversation
5. Get in on the conversation—and ignore itMaybe you are no longer needed in an ongoing email conversation—or maybe the subject matter is no longer important to you. Whatever the reason, you can prevent additional responses from appearing in your inbox. The Ignore command moves the whole conversation and any future messages that arrive in the conversation to the Deleted Items folder.Learn more: Ignore all email messages in a conversation
6. Let colleagues know when you aren’t aroundIf you’re going to be heading out on vacation or even just away for the day, you can let your colleagues know your schedule and when they can expect to hear from you again. Customize automatic responses to emails you receive whenever you are unavailable.Learn more: Automatically reply to email messages with an Exchange account.
7. Protect what you sendIt’s easy to communicate with pretty much anyone via email. But there are times when you don’t want email you send to be forwarded to others, or printed out, or copied. You can use Information Rights Management (IRM) to help prevent sensitive email from being read, printed, forwarded, or copied by unauthorized people.Learn more: Introduction to IRM for email messages
8. Have it all in one place—and hear it, tooWith Unified Messaging (UM), you can receive email, voice, and fax messages in your Outlook Inbox. If you have an Exchange Server 2010 account, you can get Voice Mail Preview, which delivers both a recording and text that’s been created from the voice recording using automatic speech recognition.Learn more: Introduction to Microsoft Exchange Unified Messaging
9. Contact info is at your fingertipsThanks to the Microsoft Outlook Global Address List (GAL), you no longer have to keep your contacts’ information stored on your computer–where it takes up space and gets out of date before you can manually update it. The Global Address List (GAL) tracks it all for you: phone numbers, building location, email addresses, and more.
10. Make sure they get itNeed to make sure your boss reads an email that you send her? Want to get your team to vote on their favorite restaurant for your team outing? You can add many different types of tracking to your email messages, including delivery and read receipts, voting buttons and follow-up actions.Learn more: Add tracking to email messages
11. Meet anywhere, anytimeGrab them for a meeting–just once or every week–find a meeting room, and even schedule meetings in a different time zone. Clicking the New Meeting button gives you access to everything you need to set up meetings with one or many.Learn more: Schedule a meeting with other people
12. Let someone else mind your calendarYou need to hand over your scheduling responsibilities to someone else—for just a bit, or for a good while. Or maybe you need to manage someone else’s schedule. The Delegate Access feature in Outlook lets meeting requests be received, accepted, and even sent for you by someone else.Learn more: Delegate access: Let someone else mind your calendar
13. Check email from any computerDon’t worry about dragging your laptop with you everywhere you go anymore: You can access your email from any computer connected to the Internet using any major web browser—even if it doesn’t have Microsoft Outlook on it. Outlook Web App (OWA) is a web-based version of Outlook that lets you access and send email, manage your calendar, and more.Learn more: Outlook Web App in Exchange 2010
14. It’s on your phone!Did we say forget about dragging your laptop with you? Well, forget about even needing to have a computer—Windows Phone 7 automatically comes with Office Mobile so you can check and send email, update your calendar, and keep on top of all that you need to.Learn more: Office Mobile site
15. No more extra gearIt used to be that when you were outside of your organization’s firewall, like when you were working from home or traveling, you’d need to log in to Outlook using a virtual private network (VPN) connection, which often required a smartcard or special tokens. Now Outlook offers Outlook Anywhere, an alternative to VPN connections that lets you use Outlook just as you normally do at your organization, without the need for special connections or hardware.Learn more: Use Outlook Anywhere to connect to your Exchange Server without a VPN

10 ways to control your inbox in Outlook 2010

You can prevail in the seemingly endless battle against email chaos — it’s just a matter of knowing which Outlook tools to use and how to set them up to fit your needs.
When oh when oh when will we ever feel that we are back in control of our Inboxes? It seems that the faster technology moves, the more mail pours in on us from all sides. We get messages from colleagues and peers, from family and friends, from causes and social media sites. Much of this stuff we need to know, of course. But it doesn’t need to take up permanent residence in our Inboxes. Here are some practical ways to use Outlook 2010 features to bring your Inbox back under control.
1: Use Conversation view
Conversation view is a new feature in Outlook 2010 that threads together all e-mail messages in a particular conversation among two or more people. The conversation includes sent and received messages so that you can easily see the whole conversation at a glance. Turn on Conversation view by clicking the View tab and clicking Conversations. Choose Show Messages In Conversations to get started. You can also set other options, such as Always Expand Conversations, in the Conversations list to set up the conversation display the way you want it.
2: Ignore threads that annoy you
Have you ever been cc’d on a conversation that made your eyes roll up in your head? Or perhaps two team members are debating the use of the serial comma and you really have other things you need to focus on today. You can ignore a conversation and remove yourself from receiving further posts in that particular thread. Click the last message in the thread you want to ignore. Then, in the Home tab, click Ignore in the Delete group. A message box appears telling you what to expect. Click Ignore Conversation to complete the job.
You can opt out of future messages in conversations that leave you cold.
3: Automate message management with Quick Steps
Quick Steps are a new feature in Outlook 2010 that enables you to automate mail management tasks with a single click of the mouse. You can use the Quick Steps that come with the program — Add To Calendar, To Manager, Done, Team E-mail, and Reply & Delete — to instantly send messages where they need to go. You can also create your own Quick Steps by clicking the More button in the Quick Steps gallery and choosing Create New.
4: Build your junk mail file
This may seem like a no-brainer, but it is important to right-click any junk message you receive, point to Junk, and click Block Sender. Over time, this creates quite a file of spammers and other unwanted senders you can immediately cut right out of your Inbox real estate. Nice.
5: Make your peace with AutoArchive
Those of us who like to have quick access to important messages may not be too comfortable letting Outlook wrap old messages up in a bundle and tuck them away in an archive file on our computers or the company server. But if you’re game, AutoArchive can help you keep your Inbox uncluttered. By default, AutoArchive is turned off. You can enable the feature and tailor your settings by clicking the Folder tab and clicking AutoArchive Settings in the Properties group. In the AutoArchive tab, select the Archive This Folder Using These Settings option and enter the age of items you want to archive, where you want the older items stored, and whether you want the removed items to be deleted from your Inbox. After you make your choices, click OK to save the changes.
Out with the old and in with the new with AutoArchive.
6: Who makes the rules around here?
Sometimes rules aren’t such a bad idea, especially if you manage huge volumes of email and you need to organize what you receive by client, project, or contact. You can easily create rules that file your messages for you so that you can read them in detail when you get a chance or put your fingers on the one you need quickly when you go searching for it. Start by clicking the message from the sender you want to create a rule to manage. Then, click Rules in the Move group of the Home tab and choose Create Rule. Enter the desired conditions (Who is the message from? What’s in the subject line?) and choose what you want Outlook to do with it. Click OK to create the rule, and Outlook will start carrying out your wishes with the very next email message you receive.
7: Get rid of those invitations
Outlook includes a number of options that make it easy for you to tailor how mail behaves after you receive it. Some messages you really don’t need to leave in your Inbox forever. Case in point: meeting invitations. You can tell Outlook to automatically delete any message you respond to by displaying the Outlook Options dialog box (click File, click Options, and click the Mail tab). Scroll down to the Send Messages area and click the Delete Meeting Requests and Notifications From Inbox After Receiving check box. Click OK to save the change.
8: Clean everything up
So do you have a clean Inbox? One where you can go directly to a message you’re looking for without a lot of searching and scrolling? Do you organize your messages by folder and discard the ones you don’t need right away? I thought so. Me neither.
Outlook includes a few cleanup features that can help you create some breathing room in your Inbox once again. The tool gives you three choices for the item you want to clean up. You can clean up the selected conversation, clean up the current folder, or clean up folders and subfolders (which means everything). When you click the tool, Outlook lets you know that it’s going to delete redundant messages and put them in your Deleted Items folder. You can change that by clicking Settings and entering the settings you’re most comfortable with. Click OK to clean up your selection and gain a little more room for incoming mail.
9: Search smart using filters
People shy away from Outlook filters because they think they are too much trouble to use properly. But actually, the opposite is true. If you consider the time you spend pushing PgDn and scanning the various messages looking for that one you need, you know that any tool that helps you cut to the chase is a good thing. The filters in Outlook help you find messages that meet specific criteria. For example, you can instantly display only messages that have attachments, messages you sent to a specific person, messages with the word “petunia” in the body of the message, and so on. Once you create this focused subset of messages, you can do what you like with them — delete them, put them in a folder that won’t clog up your Inbox, or print them and hang them on your cubicle wall (but why?). You’ll find the filters in the Filter E-mail tool in the Find group of the Home tab. You can click More Filters to display the Search Tools contextual tab so that you can see all the filters together in convenient spot.
10: Combine and conquer
Okay so it may seem counterintuitive, but it actually saves you time to bring all your different Web-based email accounts into Outlook 2010. You can easily set up your accounts by clicking the File tab and choosing Add Account in the top of the center column in the Info tab of Backstage view. Follow the prompts to get the email working properly. This will create a new email folder for your Web-based account. So anytime you check email (or Outlook does it automatically), all accounts are checked and you never have to go out to the various sites, enter your email address and password, and do the checking yourself. Yes, it could give you more messages to deal with. But after reading through the other nine tips in this article, you have a handle on how to do that, right?