Under specific circumstances and with careful tweaking, you can increase Windows 7’s performance using the Processor Affinity setting.

If you have a multi-core processor, chances are good that on the Performance tab in Windows Task Manager, you have noticed that the CPU Usage History graphs look about the same for each core, as shown in Figure A. The reason for this is that most applications you run these days have been designed with multi-core processors in mind and will work with the operating system to distribute their operations as evenly as possible across all the available cores.
Figure A
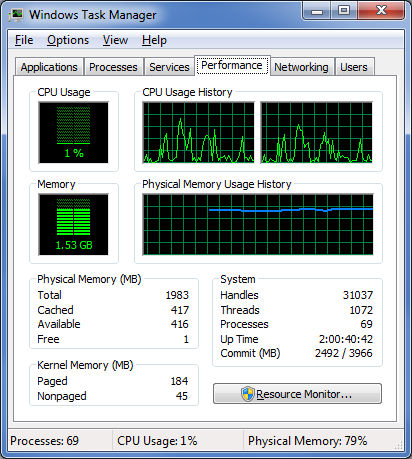
In most cases, you’ll notice that the CPU Usage History graphs look about the same for each core.
In most cases this even distribution provides you with the best performance possible. However, that’s not always going to be the case. For instance, older applications that were designed for single-core processors can behave irrationally — they may all of a sudden begin maxing out the CPU usage at 100 percent and appear to be locked up. In other circumstances, you might be able to achieve better overall performance from certain applications by configuring each of them to run on different processor cores.
Fortunately, Windows 7 allows you to configure applications to use only one, or several, of the processor cores in a multi-core system by using the Processor Affinity setting.
In this edition of the Windows Desktop Report, Iwe’ll show you two ways to change the Processor Affinity setting in Windows 7.
From Task Manager
Changing the Processor Affinity setting from within Task Manager is a pretty straightforward operation once you know how to do it. To launch Task Manger, you can use the keystroke combination [Ctrl] + [Shift] + [Esc] or you can simply right-click on the taskbar and select Task Manager from the context menu.
Once Task Manager is up and running, select the Applications tab, right-click on the application that you want to work with, and select the Go to Process command, as shown in Figure B. When you get to the Processes tab, right-click on the process and from that context menu, select the Set Affinity command, as shown in Figure C. (If the processes are jumping around, it may be hard to select the correct process, so you might just want to press the Application key or [Shift]+[F10].)
Figure B
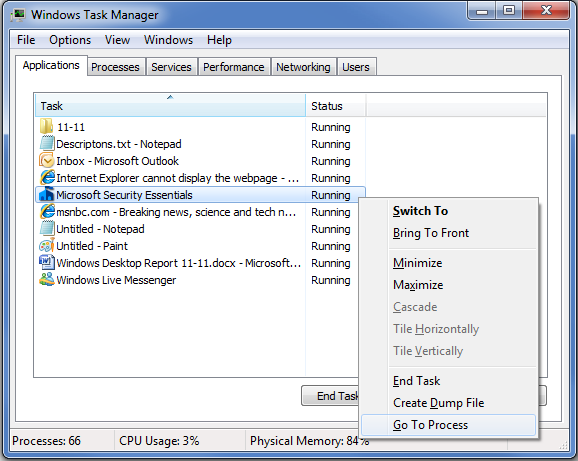
Right-click on an application and select the Go to Process command.
Figure C
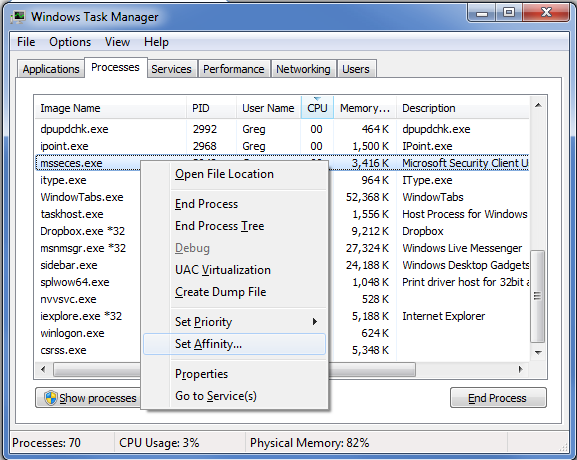
Right-click on the process and select the Set Affinity command.
After you select the Set Affinity command, you’ll see the Processor Affinity dialog box shown in Figure D. As you can see, the default setting is All Processors, which in the case of my example system are CPU 0 and CPU 1. At this point, you can clear the All Processors check box and then select the CPU on which you want the process to run.
Figure D
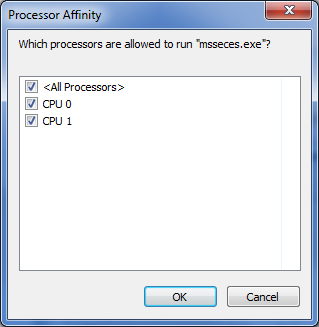
The Processor Affinity dialog box allows you to choose which processor(s) you want to use.
An example
To take a look at the effects of using the Set Affinity command, we launched two applications: Microsoft Security Essentials and Disk Defragmenter. Next we used the Set Affinity command to assign Microsoft Security Essentials to CPU 0 and Disk Defragmenter to CPU 1. We then started each application running — Microsoft Security Essentials performing a full scan and Disk Defragmenter defragging a 500GB disk.
Once each application began working, they started sucking up CPU time, so we went to the Performance tab in Windows Task Manager to look at the CPU Usage History graphs. When we did, we could see that each graph was showing different measurements, as shown in Figure E.
Figure E
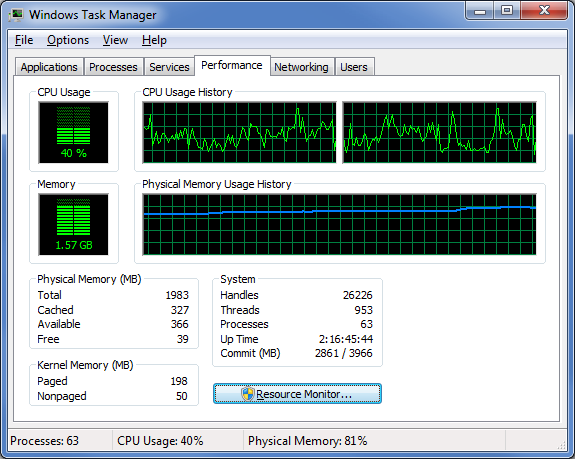
Each of the CPU Usage History graphs shows different measurements.
To specifically see how each CPU core was faring, we launched Resource Monitor and selected the CPU tab. Again, we could see that each CPU core was showing different usage measurements, as shown in Figure F.
Figure F
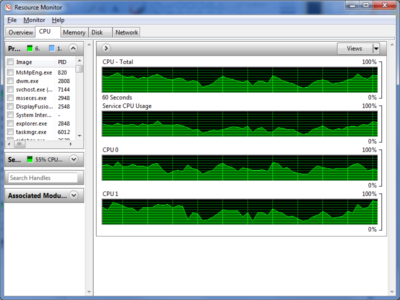
Resource Monitor’s CPU tab specifically identifies each CPU core and its usage.
Now, of course, my example combination is purely for the sake of showing each CPU handling a separate process. However, there are instances where running Microsoft Security Essentials on a separate CPU core would be beneficial.
From a shortcut
Now if you find that running an application on a specific CPU core works well, you might want to use it again in the future. If so, chances are that you won’t want to have to go through the Task Manager each time. Fortunately you can create a shortcut to launch an application with a specific affinity setting.
For example, to launch Disk Defragmenter so that it runs only on CPU 0, you would create a shortcut with the following command line:
C:\Windows\System32\cmd.exe /C start /affinity 1 dfrgui.exe
To launch Disk Defragmenter on CPU 1, you would create a shortcut with the following command line:
C:\Windows\System32\cmd.exe /C start /affinity 2 dfrgui.exe
The number that follows the start /affinity command is called the affinity mask and is defined as a hexadecimal number. However, the CPU core number can be calculated more easily using binary numbers. For instance, the command
C:\Windows\System32\cmd.exe /C start /affinity 3 dfrgui.exe
will launch Disk Defragmenter on both CPU 0 and CPU 1. If you convert 3 into a binary number you will get 0011. Under the affinity mask system, processors are numbered from the right to left beginning with 0 and since there are 1’s in the first two places, this indicates CPU 0 and CPU 1.
Suppose you have a Quad core processor. If so and you use an affinity mask of 4, that will convert into binary 0100, which indicates CPU 2. If you use an affinity mask of 9, that will convert into binary 1001, which indicates CPU 0 and CPU 3.
For more information on the start /affinity command, open a Command Prompt window and type the command
start /?
Have questions?
Get answers from Microsofts Cloud Solutions Partner!
Call us at: 856-745-9990 or visit: https://southjerseytechies.net/
South Jersey Techies, LL C is a full Managed Web and Technology Services Company providing IT Services, Website Design Services, Server Support, Network Consulting, Internet Phones, Cloud Solutions Provider and much more. Contact for More Information.
To read this article in its entirety click here.