Client Hyper-V is a virtualization tool that comes with Windows 8 Professional and Windows 8 Enterprise. Using Client Hyper-V can run Windows XP applications on a Windows 8 machine. This tool requires that your system has a minimum of 4GB of RAM, 64-bit CPU that supports Second Level Address Translation (SLAT). Also, the key virtualization feature must be enabled prior to setup.
Step 1 – Getting Started with Windows 8 Client Hyper-V
Step 2 – Installing Client Hyper-V
Step 3 – Create a Virtual Switch
Step 4 – Create a Virtual XP Machine
Step 5 – Setup USB Access
Step 6 – Install RemoteApp Tool
Step 1 – Getting Started
Launch and verify System Information:
- To access the Apps Search page: [Windows] + Q keystroke.
- In the text box type msinfo32 and click msinfo32.exe.
- Scroll to the bottom of the right panel and the following values are set to Yes: (If the Second Level Address Translation Extensions or the Data Execution Protection values are set to No, then you will not be able to use Windows 8’s Client Hyper-V.)
- Hyper-V – VM Monitor Mode Extensions
- Hyper-V – Second Level Address Translation Extensions
- Hyper-V – Virtualization Enables in Firmware
- Hyper-V – Data Execution Protection.
Enabling Virtualization through Setup Utility
- Before the operating system loads, boot into your Setup Utility.
- Select Computer Setup (If applicable)
- Scroll to Security drop-down menu and select System Security.
- Enable Virtualization Technology.
- Save Changes and Exit.
Go to Step 2 – Installing Client Hyper-V.
Step 2 – Install Client Hyper-V
- To access the Programs and Features tool: [Windows] + X keystroke.
- Select Turn Windows Features on or off (located in the left panel).
- Select the Hyper-V box.
- Click OK. After Installation there will be a prompt to Restart the system.
Go to Step 3 – Create a Virtual Switch.
Step 3 – Create a Virtual Switch
For a VM to connect to your network or Internet, the VM must be connected to a Virtual Switch.
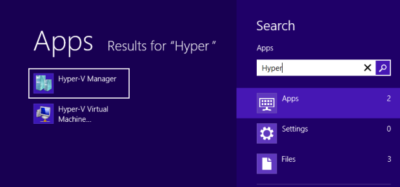
- Open Hyper-V Manager (Start Screen)
- In the Actions Pane, select Virtual Switch Manager.
- Choose the type of Virtual Switch you would like to create: External*, Internal and Private.
- External: Connection with entire network and Internet.
- Internal: Connection with “Host” machine network connection only.
- Private: Connection with other virtual machines only.
- After selecting the type, another window will open where you can Name the switch and add the Description.
- Click OK. Then click Yes to “Apply Networking Changes”.
In a typical Client Hyper-V Configuration, you will not use the following settings:
- “Enable virtual LAN identification for management operating system in the VLAN ID” check box.
- Extensions (Located under the Virtual Switch on the left panel).
- MAC Address Range (Global Network Settings on the left panel).
Go to Step 4 – Create a Virtual XP Machine.
Step 4 – Create a Virtual XP Machine
- Open Hyper-V Manager (Start Screen)
- In the Actions Pane, select New and then Virtual Machine…
- Before You Begin window, click Next.
- Specify Name and Location window, you can name your VM and where you would like to save it, then click Next.
- Assign Memory window, type the amount of memory you would like to allocate for the VM (8MB – 1804MB), then click Next.
- Configure Networking window, click Next.
- Connect Virtual Hard Disk window, you can Create a virtual hard disk, Use an existing virtual hard disk or Attach a virtual hard disk later, then click Next.
- Installation Options window, you can Install the OS later, Install an OS from a boot CD/DVD or ISO, Install OS from boot floppy disk or Install OS from a netowrk-based installation server.
- Then click Next to view the Summary or click Finish to complete the setup.
Setting up the Networking settings for an XP machine requires additional steps.
- Open Hyper-V Manager (Start Screen)
- In the Actions Pane, select Settings…
- Select Legacy Network Adapter in the “Add Hardware” section, then click Add.
- In the “Legacy Network Adapter” section, select the Virtual Switch you created in the last step.
- Click Apply and then OK.
Installation:
- Insert the Windows XP CD into the computer.
- Open Hyper-V Manager (Start Screen)
- Select your VM and then in the Actions Pane, select Connect.
- Click the Green Power Button.
- Once Windows XP Installation appears, follow all of the installation steps.
Go to Step 5 – Setup USB Access.
Step 5 – Setup USB Access
Client Hyper-V does not support USB access. Setting up a Remote Desktop Connection allows the XP Virtual Machine to access USB devices while also providing a full screen display and better performance. For Remote Desktop Connection to work the Host and Client machines must be setup on the same Workgroup.
Host Machine Setup:
- To access the System window: [Windows] + [Break] keystroke.
- From this window, you can change your Computer Name and the Workgroup name.
- Restart machine.
Client Machine Setup:
- Open Hyper-V Manager (Start Screen)
- Select your VM and then in the Actions Pane, select Connect.
- Click the Green Power Button.
- To access the System window: [Windows] + [Break] keystroke.
- Select the Remote tab, check the box to “Allow users to connect remotely to this computer“.
- Click Apply and OK.
- Select Computer Name tab, you can change your Computer Name and the Workgroup name.
- Restart machine.
Setting up initial remote connection:
- Acccess the App Search Page on the Host Machine: [Windows] + Q keystroke.
- In the text box type Remote and click Remote Desktop Connection.
- Remote Desktop Connection window, click the Show Options button.
- Type: Windows XP System name and Windows XP User name, then click Save As and assign a Connection name.
- Select the Local Resources tab, in the Local devices and resources section, click More.
- Select all the devices you would like access to, and then click OK.
- Return to the General Tab and click Save.
- Select Connect.
- After logging in you can install XP drivers, install a printer and access Host machine files.
Go to Step 6 – Install RemoteApp Tool.
Step 6 – RemoteApp Tool
RemoteApp tool can directly access Windows XP applications from Windows 8.
Install RemoteApp Update
- Open Hyper-V Manager (Start Screen)
- Select your VM and then in the Actions Pane, select Connect.
- Open IE, go to Microsoft Download Center, and search for Enable Remote App.
- Select “Update for Windows XP SP3 to enable RemoteApp” and click Download.
- Follow instructions to install RemoteApp, select Finish. After Installation there will be a prompt to Restart the system.
Modify the Registry
- Open Run [Windows] + R keystroke.
- In the text box type Regedit to open Registry Editor.
- Go to: HKEY_LOCAL_MACHINE\SOFTWARE\Microsoft\Windows NT\CurrentVersion\Terminal Server\TSAppAllowList
- In TSAppAllowList, select fDisabledAllowList, change the value from 0 to 1.
- Click OK.
File Path to EXE for Programs (For each Application)
- Locate the application shortcut.
- Right click on it.
- Select the Properties.
- In the Properties dialog box, select the Find Target button.
- Copy the path and executable file name.
- Log off but keep the Virtual Machine running.
Customize RDP File (Saved in Step 5)
- Navigate to your RDP file and copy/paste a copy of the file.
- Rename the copy to an *Application*.rdp. (Example: Outlook.RDP)
- Open the file using Notepad and make the following changes:
- Locate:
- remoteapplicationmode:i:0
- alternate shell:s:
- Change to:
- remoteapplicationmode:i:1
- alternate shell:s:rdpinit.exe
- Add:
- disableremoteappcapscheck:i:1
- remoteapplicationname:s:{Application Name}
- remoteapplicationprogram:s:{Path to executable file}
- Select File and Save.
Return to Step 1 – Getting Started with Windows 8 Client Hyper-V.